
Losing hours of progress on a Nintendo 3DS game feels worse than it should. A corrupted SD card or a botched system update can wipe out saves you spent years building and panic sets in fast when the console won’t recognize your old data.
The good news has that recovering lost progress is usually possible if you know how to restore data backup on 3DS the right way. This guide walks through the exact 3DS recovery tool, steps and precautions that actually work. Without the guesswork that leads to more damage.
Why 3DS Save Data Gets Lost in the First Place
Save data loss on the 3DS almost always traces back to one of a few root causes. A failing SD card is the most common culprit, especially on older cards that have been in use for years.
System transfers, botched CFW installs and moving files between SD cards without the right encryption keys also cause save data to become unreadable. Once a card shows signs of corruption like vanishing HOME Menu icons or broken banners, the clock is ticking on that data.
Warning Signs Your SD Card Is Failing
Catching corruption early is often the difference between a quick fix and a total loss. These are the most common early warning signs roughly order from mild to severe.
| Warning Sign | What It Usually Means | Urgency |
| Game icons missing from HOME Menu | Minor file table corruption | Back up now, low risk |
| Slow read or write speeds | Card wear or failing memory cells | Back up soon, moderate risk |
| Console freezes when loading a specific game | Localized corruption in that game’s save data | Back up affected game immediately |
| SD card not detected at all | Possible physical or controller failure | Stop using the card, attempt recovery only |
| Random system crashes or reboots | Deeper corruption affecting system files | Back up everything possible, consider NAND backup |
What You Need Before You Start
Before touching anything, gather the right tools. Trying to restore save data without proper prep is the fastest way to make things worse.
You’ll want a hacked 3DS running Luma3DS custom firmware, a computer to handle file transfers and a reliable SD card reader. The two homebrew applications that matter most here are Checkpoint, which handles save and extdata backups and GodMode9, which manages full system level backups.
How to Restore Data Backup on 3DS Using Checkpoint
Checkpoint is the simplest route for most users and it works whether you’re recovering from a corrupted card or just moving saves to a new one. This method targets individual game saves nor than the whole system.
Start by copying the Checkpoint.3dsx file into the 3ds folder on your SD card nor then Nintendo 3DS system folder. Add boot.firm, boot.3dsx and the config folder from Luma3DS to the root of the card as well.
Once has done insert the card back into your console and boot into the Homebrew Launcher. From there launch Checkpoint select the games you need and back up both save data and extdata before doing anything else.
If you’re restoring rather than backing up, the process flips slightly. Install each game fresh first to initialize its save slot. Open it once to confirm it loads then use Checkpoint to select your backup file and restore it over the fresh save.
Quick Checklist Before Restoring Any Save
A few small mistakes account for most failed recovery attempts, so run through this list first:
- Confirm the game is installed and has been opened at least once
- Never restore a save from a different region version of the same game
- Keep a copy of your backup folder on your computer not just the SD card
- Format any SD card that showed corruption signs before reusing it
- Avoid mixing save data between different 3DS consoles unless you understand the encryption risks
Restoring Full System Backups With GodMode9
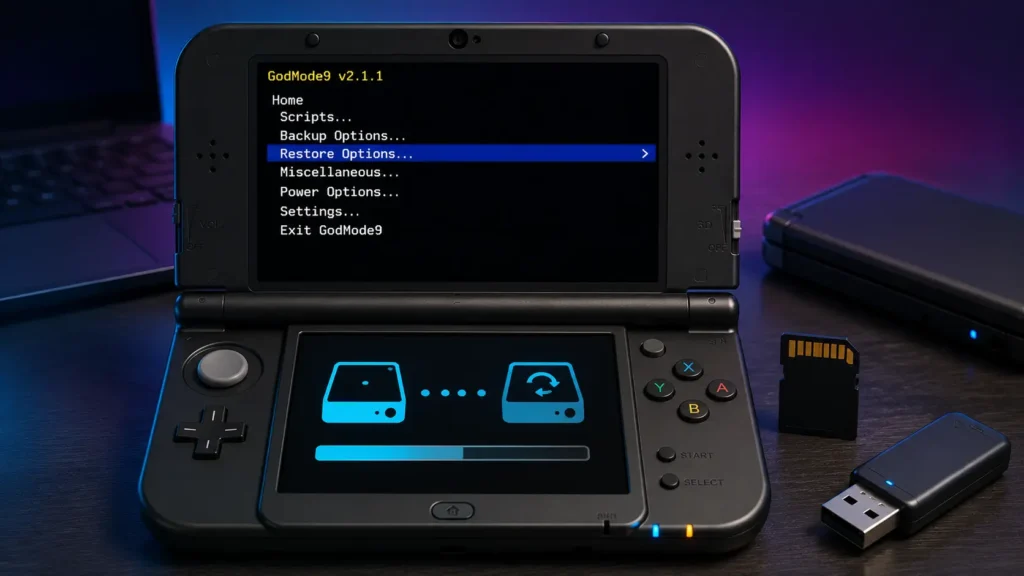
Checkpoint handles game saves but sometimes the whole system needs to go back to an earlier state. That’s where GodMode9 comes in and it works at a much deeper level than a simple save file swap.
GodMode9 creates full NAND backups which is essentially a snapshot of your entire 3DS system separate from the SD card. If you made one of these backups before things went wrong, restoring it can undo almost any software level disaster.
To restore, copy your saved NAND backup file to the root of your SD card, boot into GodMode9 by holding Start during power on then select the backup file from the SD card menu. Choose the safe SysNAND restore option, confirm with the required button combination and let the process finish without interrupting it.
This method rolls back your entire system including settings and installed titles, to match the backup. It won’t touch files stored purely on the SD card, so anything saved there after the backup was made stays intact.
Checkpoint vs GodMode9, Powerful Tools, Real Trade-offs
Choosing the right tool depends on what actually broke. The table below breaks down when each option makes sense.
| Situation | Best Tool | What Gets Restored |
| Single game save lost or corrupted | Checkpoint | Individual save and extdata |
| SD card failed but console still works | Checkpoint | Save files moved to new card |
| Entire system bricked or unstable | GodMode9 | Full NAND, settings, and titles |
| Testing a risky CFW change | GodMode9 | Complete system rollback |
| Moving saves between two SD cards | Checkpoint | Save and extdata only |
Managing backup versions and archived save files is much easier when you follow the same structured approach explained in our AI Chatbot Conversations Archive guide. If you’re only missing progress in one or two games, Checkpoint is faster and far less risky. Save the NAND restore for situations where the whole console is misbehaving.
Common Mistakes That Make Recovery Harder
A lot of failed recovery attempt happen because people skip a step or rush the process. Copying an old Nintendo 3DS system folder directly onto a new SD card. For example, almost always causes fresh corruption instead of fixing anything. If Windows refuses to copy files to your SD card because of permission issues, our guide on You Don’t Have Permission to Save in This Location walks through the most common fixes.
Another frequent issue involves movable.sed, the encryption key tied to each console’s system data. Save files encrypted under one console’s key generally can’t be decrypted using a different console’s key, which is why saves from a friend’s old 3DS often won’t open on your system without extra steps.
Skipping the format and test step on a previously corrupted SD card is another common trap. Reusing a failing card, even after backing up, tends to invite the same corruption right back.
Building a Backup Routine That Prevents This Next Time
Most 3DS data loss is preventable with a small routine rather than a one time fix. A little consistency here saves far more time than any recovery method later.
Back up saves through Checkpoint after any major milestone, not just occasionally, since a save lost an hour after your last backup still stings. Keep at least two copies of important backups, one on the SD card and one on a computer or external drive, since a single point of failure defeats the purpose of backing up at all.
Replace SD cards proactively once they start showing early warning signs rather than waiting for a full failure, and avoid buying unbranded or unusually cheap SD cards, since counterfeit and low quality cards are a common source of premature corruption on handheld consoles.
When Save Data Might Be Unrecoverable
Not every save survives. If the original SD card is physically damaged beyond what formatting can fix or if no backup existed before corruption set in. Recovery options shrink considerably.
In these cases, dumping the NAND and EmuNAND partitions and mounting them through tools built for that purpose is sometimes the last resort. Even then success depends heavily on whether the relevant encryption keys are still accessible. So this route works far better as a last resort than a first attempt.
Final Thoughts
Recovering lost progress doesn’t have to feel like a gamble once you understand how to restore data backup on 3DS properly. Checkpoint handles most everyday save recovery situations, while GodMode9 steps in when the entire system needs a reset.
The real key to avoiding this stress altogether is backing up early and often before a corrupted card or failed transfer forces your hand. As a routine habit rather than a reaction to a crisis that’s already happened. Whether you’re protecting game saves or business systems, the recovery strategies explained in System Recovery Backup Exec show why regular backups are always your best defence against data loss.
FAQs
Can I restore 3DS save data without a backup?
Recovery without an existing backup is difficult and not guaranteed. In some cases, dumping NAND and EmuNAND images can salvage data but success depends on whether the console’s original encryption keys are still intact.
Does Checkpoint work on an unmodified 3DS?
No, Checkpoint requires a hacked console running Luma3DS custom firmware and Homebrew Launcher access. It cannot run on a stock and unmodified 3DS system.
Will restoring a NAND backup delete my SD card data?
No, a NAND restore only affects internal system data. Files stored on the SD card including installed games and downloaded content. Remain untouched by the restore process.
Can I use save data from a friend 3DS on my own console?
Usually not directly since save files are often tied to the console unique encryption key. Transferring saves between different consoles typically requires extra tools and doesn’t always work.